So, you’re thinking about getting new windows, huh? It’s a big job, and honestly, the most important part is getting the measurements right. Mess this up, and you could be looking at windows that don’t fit, don’t open right, or just look plain weird. It sounds simple enough, but there are a few tricks to it. We’ll walk you through how to measure for replacement windows so you don’t end up with a headache or a hole in your wallet.
Key Takeaways
- Always measure width at the top, middle, and bottom of the window opening, and use the smallest measurement for the best fit.
- For height, measure from the sill to the top of the frame on the left, middle, and right, and use the smallest measurement.
- Don’t forget to measure the window depth to make sure the new window will sit correctly within the existing frame.
- Different window types, like casement or bay windows, have unique measuring needs, so pay attention to those specifics.
- Double-checking your measurements is vital; measure each window at least three times and keep a clear record of all dimensions.
Understanding the Importance of Accurate Window Measurements
Getting your window measurements right is super important, honestly. It’s not just about making sure your new blinds or curtains look good, though that’s part of it. If you mess up the measurements, you could end up with something that doesn’t quite fit, leaving weird gaps or maybe even scraping against the window frame. That’s a real bummer, and nobody wants that hassle.
Why Precise Measurements Matter for Your Windows
Think of it this way: window coverings are usually made to the exact size you give the manufacturer. There’s really no wiggle room. If you measure a window as 30 inches wide, and it’s actually 30 and an eighth, the thing might not fit at all. Getting it right the first time saves you a ton of headaches later on. It means your window treatments will operate smoothly, block light effectively, and just generally look like they belong there.
Avoiding Costly Mistakes with Careful Measuring
Nobody likes wasting money, right? Ordering the wrong size window treatments can be a surprisingly expensive mistake. You might have to pay for returns, or worse, end up with something you can’t use. Taking a few extra minutes to measure carefully can prevent you from having to buy replacements. It’s way better to be a little bit patient now than to be frustrated and out of pocket later. Plus, it’s a good way to get a feel for your home’s actual dimensions, as even windows that look the same can be slightly different.
Ensuring Functionality and Performance
Beyond just looks, accurate measurements are key for how your window coverings actually work. For example, if you’re getting shades for an inside mount, you need to make sure there’s enough clearance for them to move up and down without hitting anything. The depth of your window frame is a big deal for this, especially with certain types of shutters that need space to tilt. Getting these details right means your windows will function as they should, providing the light control and privacy you want without any fuss. It’s all about making sure everything operates smoothly, from the initial measurement to the final installation. You can find some helpful tips on measuring for window treatments on this guide.
Essential Tools for Measuring Your Windows
Alright, let’s talk about the tools you’ll need to get those window measurements just right. It’s not rocket science, but having the right gear makes the whole process way smoother and, honestly, less frustrating.
Your Go-To Steel Tape Measure
This is probably the most important thing you’ll grab. You want a steel tape measure, not one of those cloth sewing tapes. Those stretchy ones can really throw off your numbers, and we definitely don’t want that. Make sure it has clear markings, ideally down to an eighth of an inch. It’s good to have one that’s at least 10 feet long, just in case you have some bigger windows. Having a reliable tape measure is key to getting accurate readings.
Pencil and Notepad for Recording
As you measure, you’ll be jotting down numbers. It’s super easy to forget a measurement or mix up which window you were working on. So, grab a pencil and a notepad, or even just use your phone’s notes app. The main thing is to write down each measurement right away. You might want to label each window as you go, like “Living Room Left” or “Kitchen Bay Window.” This will save you a headache later when you’re trying to figure out what’s what. It’s also helpful to have a system for recording, maybe a simple table:
| Room | Window ID | Width (in) | Height (in) | Depth (in) |
|---|---|---|---|---|
| Living Room | LR-1 | 35 1/2 | 48 | 4 |
| Kitchen | K-Bay-Center | 24 | 46 | 3 7/8 |
Ladder or Step Stool for High Windows
If you’ve got windows that are up there, you’re going to need a little help reaching them safely. A sturdy step stool or a ladder is a must. Just be careful when you’re up there – make sure it’s on a stable surface. You don’t want to be stretching too far or wobbling around. Safety first, always! If you’re not comfortable with heights, it might be worth asking a friend or family member to help out, or even looking into professional help for those tricky spots. You can find some good guides on how to measure windows for blinds online if you need a visual aid.
Remember, taking your time with these tools and being methodical will prevent costly mistakes down the line. It’s better to measure twice (or even three times!) and get it right the first time.
Mastering the Width Measurement
Let’s talk about getting the width just right. This is super important because even a tiny bit off can make a big difference, especially if you’re ordering custom blinds or shades. They’re made to the exact size you give them, so there’s really no wiggle room for errors.
Measuring Width at Three Key Points
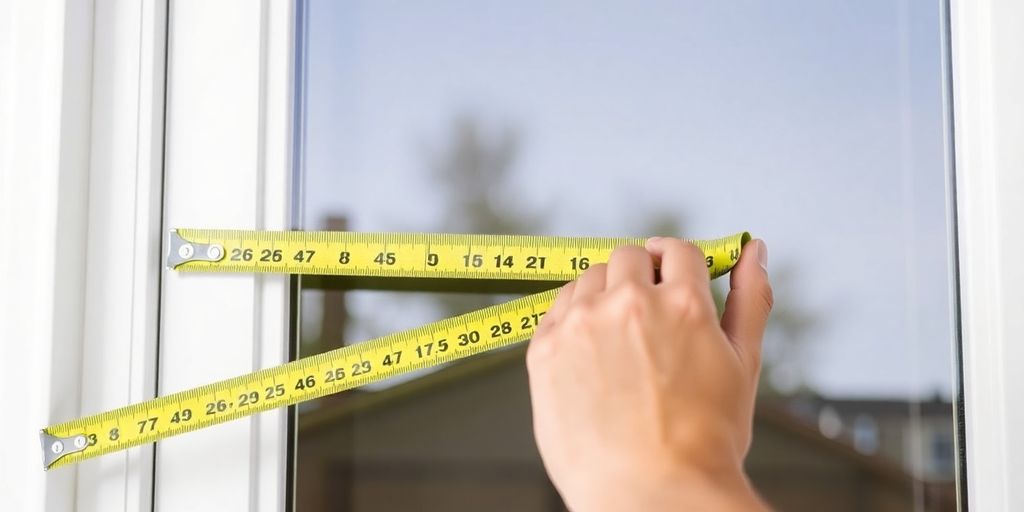
To start, you’ll want to grab your trusty steel tape measure. Decide if you’re doing an inside mount (where the covering fits inside the window frame) or an outside mount (where it goes over the trim). This choice affects how you measure. For the width, you need to measure horizontally in three spots: at the very top of the window opening, in the middle, and then down at the bottom. Write these numbers down as you go.
Selecting the Narrowest Width for Fit
Once you have your three width measurements, compare them. The number you’ll want to use is the smallest of the three. This accounts for any slight bowing or unevenness in the window frame, making sure your new window covering won’t be too tight and get stuck. It’s better to have a little extra space than not enough.
Inside Frame vs. Exterior Casing
When you’re measuring for an inside mount, you’ll measure from the inside edge of the window frame to the other inside edge. For an outside mount, you’ll typically measure from the outside edge of the trim on one side to the outside edge of the trim on the other. This difference is key, so make sure you know which type of mount you’re planning for before you start measuring. It’s a good idea to check out how to measure for blinds to get a clearer picture.
Achieving the Perfect Height Measurement
Alright, let’s talk about getting the height measurement just right for your windows. This part is super important, almost as much as the width. You want your new window treatments to look good and work properly, and that starts with taking accurate vertical measurements.
Taking Height Measurements from Left to Right
Start by grabbing your trusty steel tape measure. For the height, you’ll want to measure from the top of the window opening down to where you want the treatment to end. Usually, this is the windowsill, but sometimes people want it to go a bit lower or higher. Measure this from the left side of the window, then the middle, and finally the right side. It’s like measuring for a shirt – you want to make sure it fits all around!
Using the Smallest Height for Accuracy
Just like with the width, windows can be a little bit off. You might find that the height on the left isn’t exactly the same as the height on the right. When you’re measuring for an inside mount, always use the smallest of the three height measurements you took. This way, your window treatment will definitely fit inside the frame without being too tight. For outside mounts, you might round up, but for inside fits, smaller is better.
Considering the Sill to Top Measurement
Think about what’s happening at the top of your window too. If you’re getting blinds or shades, you need to know how much space there is from the top of the window frame up to the ceiling or any molding. This is especially important if you’re doing an inside mount, as it affects how the treatment will sit within the frame. Sometimes, you might need to measure from the very top of the frame down to the sill, and then compare that to your width measurement. It helps to have a clear picture of the whole window space. If your window corners aren’t perfectly square, it’s a good idea to check the diagonal points too, just to be sure [7e80].
Don’t Forget Window Depth
Why Depth Measurement is Crucial
Okay, so we’ve talked about width and height, but don’t forget about depth! This measurement is super important, especially if you’re getting new windows or even just new blinds. It tells you how far the window frame actually goes back. Getting this right means your new window or treatment will sit properly and look great. If it’s too shallow, things might stick out awkwardly, and if it’s too deep, you might have trouble closing or operating it. It’s all about that snug, finished look.
Measuring from Inside Frame to Outer Edge
To figure out the depth, you’ll want to grab your trusty tape measure. Start at the inside edge of the window frame, right where the glass sits. Then, extend the tape measure straight out to the very edge of the outside trim or casing. You might need to do this in a few spots around the window because sometimes the depth isn’t perfectly consistent. Just jot down what you find.
Accounting for Frame Thickness Variations
Frames can be a bit quirky, right? Sometimes they’re thicker in one spot than another. You’ll want to measure the depth in a couple of places, maybe at the top and bottom, or left and right sides. If you run into any little bits of trim or stops that get in the way, just measure around them. The goal is to get the measurement of the actual frame itself. Most standard windows have a depth somewhere between 3 ¼ to 5 ¼ inches, so keep that in mind as you measure. It’s good to know this detail before you start looking at replacement options or even some types of window treatments.
Specific Considerations for Different Window Types
Measuring Casement and Double-Hung Windows
When you’re dealing with casement windows, which open outward with a crank, you’ll want to measure from hinge to hinge. For double-hung windows, the ones with two sashes that slide up and down, you need to measure both sashes. This makes sure they’ll fit nicely within the frame.
Unique Steps for Bay or Bow Windows
Bay and bow windows are a bit trickier because of their shape. You’ll need to measure each section of the window separately. Also, pay attention to the overall curve or angle of the whole bay or bow structure. This is important so your new windows look great and fit perfectly.
Measuring Awning Windows for Operation
For awning windows, which open outward from the bottom, getting the width right is super important. You need to measure horizontally from trim to trim inside the frame. This gives you the full space the window needs to open without hitting anything. It’s a good idea to check the sill space too, just to see how the window will sit and operate. Ordering custom windows is often a good idea for these types, as they can accommodate unique spaces and make sure everything works smoothly. It’s always best to measure each window individually, as sizes can vary even if they look the same. You can find more tips on how to measure windows for blinds on this helpful guide.
Double-Checking and Recording Your Measurements
So, you’ve done the hard part – measuring your windows. That’s great! But before you get too excited about ordering new blinds or shades, let’s talk about making sure those numbers are spot-on. It’s like baking a cake; you need to follow the recipe exactly, and in this case, the recipe is your measurements.
The Triple-Check Approach to Accuracy
Seriously, don’t skip this. After you’ve taken all your measurements, go back and do them again. Seriously. It’s always better to measure twice (or even three times!) and cut once. Grab your tape measure and repeat the width, height, and depth checks for each window. If you get different numbers, take a third measurement and use the smallest one for inside mounts. This little bit of extra effort can save you a huge headache later on. It’s a good idea to check if your window corners are square, too. You can do this by measuring diagonally from corner to corner; the measurements should be the same if it’s square. If they aren’t, you might need to adjust your plan or consider an outside mount. You can find more details on how to check for squareness here.
Creating a Detailed Window Schedule
Now, where do you put all these numbers? A window schedule is your best friend. Think of it as a master list for all your windows. You can easily create one using a simple spreadsheet. Just set up columns for things like:
- Room Name (e.g., Living Room, Master Bedroom)
- Window ID (e.g., LR-01, MB-02)
- Mount Type (Inside or Outside)
- Width (in inches or millimeters)
- Height (in inches or millimeters)
- Depth (if applicable)
- Any special notes (like obstructions or specific frame details)
Having this organized list makes ordering a breeze and is super helpful if you need to talk to an installer or manufacturer down the line. It keeps everything clear and prevents mix-ups.
Common Recording Mistakes to Avoid
People make mistakes, it happens! But some are pretty common when measuring windows. Watch out for these:
- Mixing up width and height: Double-check which number is which before you write it down.
- Flipping fractions: Make sure you’re recording ⅜ correctly and not as ⅝, or vice versa. Those small differences matter!
- Using different units: Stick to one unit of measurement (like inches) for all your windows. Don’t mix inches and millimeters on the same schedule. It just gets confusing.
Taking the time to get these measurements right is the most important step. It really sets you up for success and makes the whole process of getting new window treatments so much smoother.
You’ve Got This!
So, there you have it! Measuring your windows might seem a little daunting at first, but with a little patience and this guide, you’re totally ready. Remember to double-check those numbers, maybe even get a second pair of eyes to look them over. Getting it right the first time saves a lot of headaches later on. Now you can confidently pick out those new blinds or order replacement windows knowing they’ll fit just right. Happy measuring!
Frequently Asked Questions
How do I get the most accurate width and height measurements for my window?
It’s best to measure your window’s width at the top, middle, and bottom, and then use the smallest measurement. Do the same for the height, measuring on the left, middle, and right sides, and pick the smallest number. This helps make sure your new window or covering will fit even if the frame isn’t perfectly straight.
Is measuring the window’s depth really necessary?
Yes, you should always measure the depth of your window. This is important because it tells you how thick the window frame is. Knowing this helps make sure your new window or covering will fit properly inside the opening.
Should I round my measurements up or down when ordering?
For inside mounts, where the covering fits inside the window frame, you should round your measurements down to the nearest eighth of an inch. For outside mounts, which go over the frame or wall, round up to make sure it covers everything completely.
What if my window frame isn’t perfectly square?
If your window frame is a little crooked, meaning the corners aren’t perfect 90-degree angles, it’s usually okay as long as the difference is less than half an inch. Most window coverings can handle small differences. If it’s more than that, you might need an outside mount to hide the unevenness.
How do I measure bay or bow windows?
For special windows like bay or bow windows, you need to measure each section of the window separately. Also, pay attention to the angle or curve of the whole structure. This helps get custom pieces that fit the unique shape perfectly.
Why should I measure my windows multiple times?
It’s a great idea to measure each window at least three times. First, take your measurements, then check them again. If the second measurement is different, measure a third time and use the smallest number. This triple-check makes sure you have the right size and avoid mistakes.